
How to Replace Your Bathroom Exhaust Fan Easily
Introduction: Why Bathroom Exhaust Fan Replacement Is Important
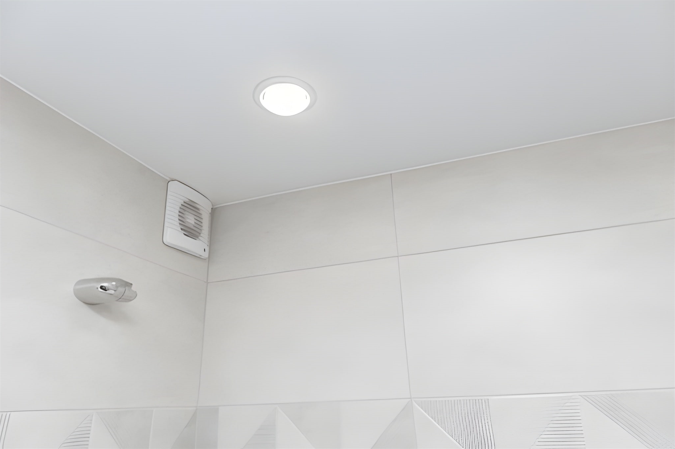
The first step to a clean and fresh bath is a running exhaust fan. It dries moisture, spreads the odors and keeps your walls free of molds. With time, the fan may lose power, produce noise or even fail altogether. This is where the replacement of bathroom exhaust fans will be necessary.
It might seem difficult to replace your fan, yet it is not complicated with a set of proper tools and guidelines. Here, we are going to teach you how to install a new bathroom exhaust fan, without being unsafe, fast, and without contracting a professional. Read on to find out how to make your bathroom have a better air flow and have a new start.
Check If Your Bathroom Exhaust Fan Really Needs Replacement

May be you want to replace your bathroom exhaust fan, but first, make sure that you have to. Most of the problems can be corrected by cleaning or simple maintenance. Nevertheless, there are symptoms that are indicative of a new one.
The fan could be operating on a worn motor in case it is producing a lot of rattling or grinding. Poor ventilation or weak airflow even after cleaning is a sign of the loss of power of the fan. In addition, when moisture on the walls, mould, or unpleasant smells remain longer, then the fan is not doing its job any more.
The fans that are above the age of 8-10 years tend to lose efficiency and become noisier. In such a scenario, it is a good idea to replace it with a new energy-efficient model. The advantage of a new fan is that you save energy, increase the air flow and keep your bathroom warm and free of mould.
Gather All the Tools and Materials
It is easier and quicker to have the right tools in place to make a replacement of your bathroom exhaust fan. You must have:
Screw driver set (Phillips and flathead)
Wire cutter
Voltage tester (for safety)
Pliers and drill
knife and tape
Safety gloves and goggles
Ladder or strong stool
Besides, prepare your new bathroom exhaust fan. Ensure that it fits the ceiling hole or the old one. Make sure that your fan electrical rating is the same as your home wiring. With all the tools and materials in reach, you do not experience interruptions and end up doing the job easily.
Select the Right Bathroom Exhaust Fan
The most critical process of your bathroom exhaust fan replacement is to choose the right fan. This new fan must be able to fit the size and air ventilation requirements of your bathroom.
Begin by checking the CFM rating this is the amount of air that this fan is capable of moving. A 50 CFM fan is suitable in small bathrooms (less than 50 sq. ft.). Bigger bathrooms have to be rated higher.
Then there is the level of noise, and that is measured in sones. A fan with 1.5 sones or less is very silent and ideal in the relaxing areas.
ENERGY STAR-labeled energy efficient models are also available and can be sought. Certain fans of the modern type are equipped with such options as humidity sensors, motion sensors, and embedded LED lighting. These renovations conserve power, and they make your bathroom more cozy.
The brand should be a good brand with good reviews and warranty cover. The right fan will keep the bathroom fresh and dry throughout the years.
Turn Off Power and Prepare the Work Area
And the first thing that you consider when changing your bathroom exhaust fan is safety. Before handling any wires switch off the main circuit breaker in your home. Test voltage with a tester to ensure that there is no current flowing to the fan.
Next prepare your workspace. Place a drop cloth or a towel to prevent dust. Take out all the decorations shelves and other things around the working space to ensure that you can see the ceiling well.
When the ceiling in your bathroom is high then balance yourself using a strong ladder or step stool. Accidents can be avoided with proper preparation and the replacement process will be easier.
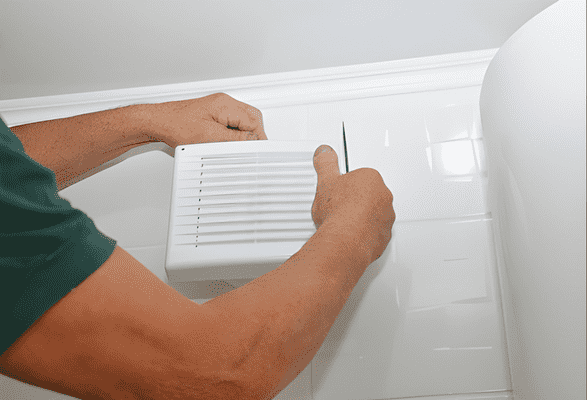
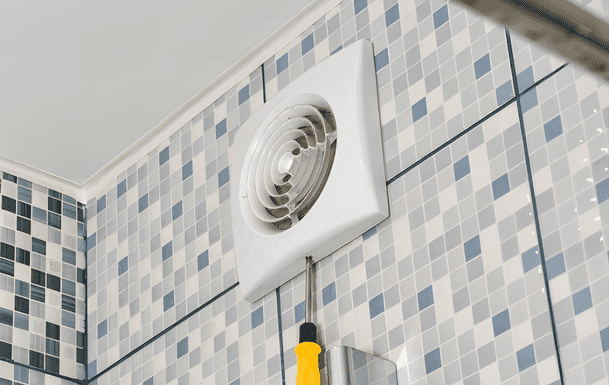
Remove the Old Exhaust Fan Safely
Now it is time to take away your old fan. Begin by removing the fan cover or grille. The majority of covers can be pulled out by just pushing with the fingers and pulling on the metal clips.
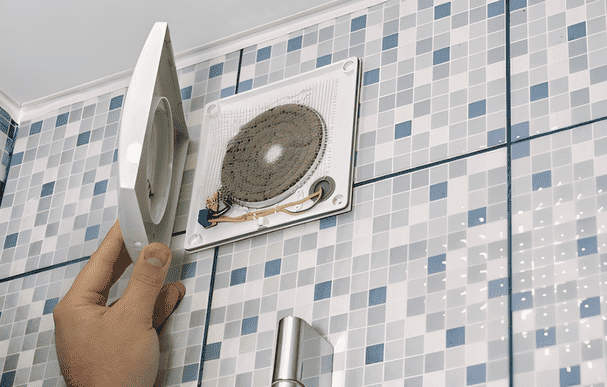
You have the fan motor housing and it is uncovered. Screw it slowly and either remove the wiring. You should always ensure that you are not touching any of the wires when the power is on.
Then, take off the screws or brackets which secured the fan housing to the ceiling. This step may need a screwdriver or a drill. Carefully remove the fan out from ceiling after it is detached.
Before you fit your new fan, clean around the opening of the fan of any dust, dirt or mold. Good fit and airflow is guaranteed by a clean surface.
Check the Vent Duct and Wiring Condition
Prior to the installation of the new fan examine the electrical wiring and the vent duct. It is an important step that is however, usually overlooked and is necessary to make the replacement of the bathroom exhaust fan successful.
Check the ducts to see whether they are filled with dust or not. Obstructed vent may result in inadequate air circulation and overheating. Use vacuum or soft brush to clean it.
Next, examine the wiring connections. In case the wires seem old or torn, or they are colored, change them or seek the help of an electrician. Wiring broken may lead to short circuiting or defective fans.
In addition to that, make sure that the duct is drained out of your house and not into the attic. Appropriate ventilation allows water to get out and avoid the growth of molds.
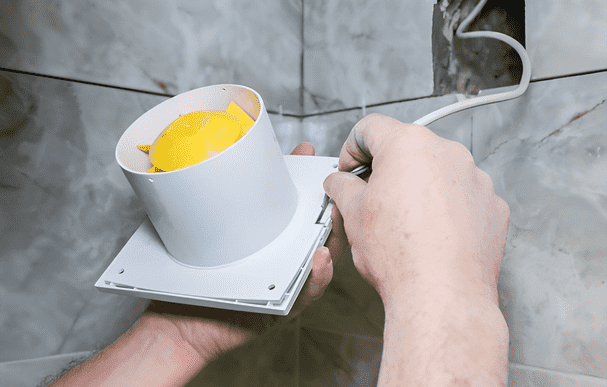
Install the New Bathroom Exhaust Fan
It is time to install your new fan. Simple steps to an easy bathroom exhaust fan replacement will follow:
Install the new exhaust fan in the hole in the ceiling.
Fit it good and attach it with the screws or mounting brackets.
Link the electric wires black to black (power) white to white (neutral) and green to ground.
Connectors should be used to fasten each connection.
Connect the duct hose to the vent outlet of the fan, and use duct tape to close the hose to avoid air leakages.
When all are in position ensure that the fan is firmly seated, and that wires are not loose.
Connect the Vent Hose and Test Airflow
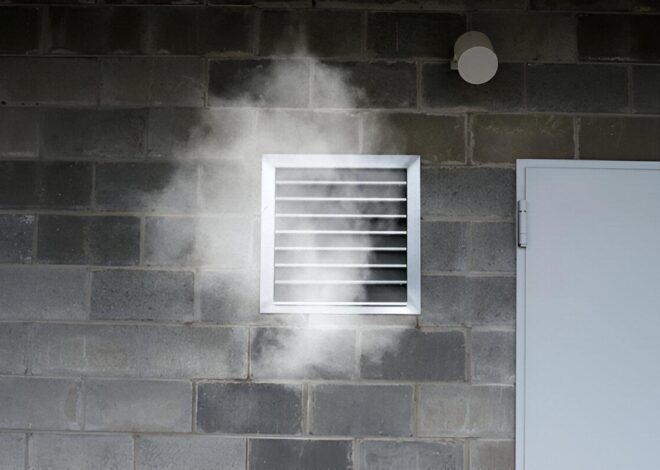
Good ventilation system entails the presence of a powerful and consistent airflow. Attach the vent hose to the outlet of the new fan with a duct tape or clamp. Make sure that the hose is not distorted, but straight because twists may decrease the flow of air.
Once the connection is made, switch the fan on to check the airflow. Touch your hand close to the vent cover, you will be able to feel the good movement of air. When breathing is labored, open the duct connection or vent flap of your house.
The step will ensure that your replacement of the bathroom exhaust fan is functioning and venting air properly.
Restore Power and Test the Fan
After connecting all the connections, reconnect power by the breaker. Turn on the fan to ensure that everything goes well.
Hear silent work – do not expect any loud vibrations or rattling. In addition, ensure that there is continuous airflow, and the fan is also fast to boot up.
In case of humming or poor suction, ensure that the wiring and duct connection is checked. This will help in preventing future problems and guarantee long-term performance through a brief checkup at an early stage.
Clean Up and Finish the Installation
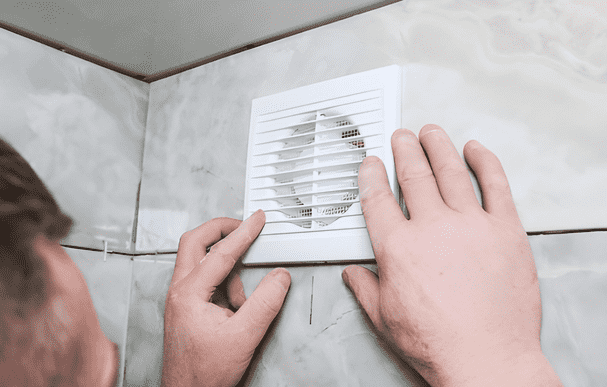
So now that your new fan is running fine, it is time to complete. Install the fan cover or grille again, and ensure that it clips together. Clean the dust or other residues of installation.
Clean the ceiling space and replace any things or decorations that you took away. Store your tools in order to maintain it later.
An installed fan will keep your bathroom dry, odor-free and fresh on a daily basis. The bathroom exhaust can be replaced with years of trouble after it is cleaned and maintained.
Conclusion: Enjoy a Fresh, Quiet, and Healthy Bathroom
You do not have to find it hard to replace your old bathroom fan. Having the right tools and proper instructions, any person can fit a replacement of the exhaust fan inside the bathroom in a short period of time. The new fan will help to keep moisture, smell and mould levels to zero in your bathroom as well as increase the air quality and comfort. Constant cleaning and good care will make your new fan last you many years. You will now have a chance to have a cleaner, calmer, and healthier bathroom each day all because of your easy DIY upgrade.

One thought on “How to Replace Your Bathroom Exhaust Fan Easily”